Table of Contents Show
Discover how to flatten yoga mat with this comprehensive guide, featuring expert tips, tricks, and techniques to achieve a perfectly flat surface for a comfortable and distraction-free practice.
You’ve finally found it: the perfect yoga mat. It’s cushiony, non-slip, and the ideal thickness for your practice. The only problem? It’s rolled up tighter than a Swiss roll and refuses to lay flat. If you’re wondering how to flatten yoga mat, you’ve come to the right place. In this in-depth article, we’ll provide you with the ultimate guide to flatten yoga mat and ensuring a smooth, stress-free practice. So, let’s unroll the knowledge (pun intended) and dive right in!
Disclosure: As an Amazon Associate I earn from qualifying purchases.

The Science Behind the Curl: Why Yoga Mats Curl Up
Before diving into learning how to flatten yoga mats, let’s take a quick look at the science behind why yoga mats curl up in the first place. Understanding the “why” can help you avoid the problem altogether.
- Material: Most yoga mats are made from thermoplastic elastomers (TPE), polyvinyl chloride (PVC), or rubber. These materials have a tendency to retain their shape when exposed to heat, pressure, or humidity.
- Storage: Rolling your mat tightly and leaving it that way for an extended period of time may contribute to its curliness.
- Usage: Over time, the pressure from your body weight can cause the mat to compress unevenly, leading to curling.
Why You Must Know How to Flatten Yoga Mats
Before we jump into the how-tos, let’s explore why having a flat yoga mat is essential.
1. Enhanced Safety and Comfort
A lumpy, uneven mat can lead to instability during your practice, increasing the risk of injury. Furthermore, an uneven surface can make it challenging to maintain proper alignment, putting unnecessary strain on your joints and muscles.
2. Improved Focus and Concentration
Your yoga practice is all about connecting with your breath and finding inner peace. It’s hard to do that when you’re constantly adjusting your mat or trying to balance on an uneven surface.
3. Aesthetics and Cleanliness
A flat yoga mat not only looks more appealing, but it’s also easier to clean. When your mat is free of creases and folds, dirt and sweat are less likely to accumulate in those hard-to-reach areas.
The 4-step Method to Flatten Your Yoga Mat
Ready to learn how to flatten yoga mat? Follow these four simple steps and watch your mat transform from a wavy mess into a smooth surface for your practice.
1. The Tried and True Method: The Reverse Roll Technique
The reverse roll technique is the simplest and most popular way to flatten a yoga mat. Here’s a step-by-step guide to getting it done:
- Lay your yoga mat flat on the ground with the side that you normally use facing down.
- Starting from one end, carefully roll the mat in the opposite direction. Make sure to keep the roll tight and even.
- Once you’ve rolled it all the way up, secure it with a strap or a rubber band.
- Leave it like this for at least 24 hours, then unroll it and enjoy a flatter mat.
Pro tip: For best results, leave the mat rolled in the reverse direction for a few days, especially if it’s been curled up for a long time.
2. The Weighty Solution: Press It Down
Using weights is another effective way to flatten a stubborn yoga mat. Here’s how to do it:
- Unroll your yoga mat on a flat surface, preferably on a clean floor or a large table.
- Place heavy, evenly distributed objects on the curled areas. You can use books, dumbbells, or even bags of rice.
- Leave the weights on the mat for at least 24 hours. Check the progress and adjust the weights if needed.
- Remove the weights and enjoy your now-flatter yoga mat.
3. The Heat Treatment: Warming Up Your Yoga Mat
Warming up your yoga mat can help relax the material, making it more malleable and easier to flatten. Just remember, moderation is key—too much heat can damage your mat.
- Place your yoga mat near a sunny window or a warm (not hot) radiator.
- Allow the mat to warm up for 1-2 hours. Check the mat periodically to ensure it’s not getting too hot.
- Once the mat is warm, unroll it on a flat surface and use one of the flattening techniques mentioned above.
4. The Stretch and Pull: Manually Fixing the Curves
Sometimes, a little hands-on approach is all that’s needed to fix a curled yoga mat.
- Lay your yoga mat flat on the ground.
- Identify the curled areas and gently pull and stretch them out with your hands.
- Apply pressure on the stretched area for a few seconds to help it retain the new shape.
- Repeat this process for all the curled areas.
Note: Be careful not to pull too hard, as it may damage the mat or cause it to tear.
Prevention is Better Than Cure: Tips for Keeping Your Yoga Mat Flat
Now that you know how to flatten yoga mat, let’s talk about prevention. Here are some tips to keep your mat in tip-top shape and avoid future curling issues.
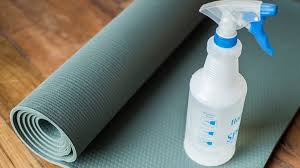
1. Clean Your Mat Regularly
Regular cleaning not only keeps your mat hygienic but also helps maintain its shape. Use a gentle cleanser specifically designed for yoga mats and avoid harsh chemicals that could damage the material.
2. Alternate Sides
When unrolling your mat for practice, alternate which side faces up. This helps balance the pressure on both sides and prevents one side from becoming more prone to curling than the other.
3. Avoid Folding or Creasing
Never fold or crease your yoga mat, as this can cause permanent damage to the material and make it more likely to curl. Instead, always roll your mat up for storage.
4. Store Your Mat Properly
When not in use, store your mat in a cool, dry place away from direct sunlight. Ideally, hang your mat or store it vertically to avoid pressure on the edges that could lead to curling.
Extra Tips for Specific Mat Materials
Different yoga mat materials may require unique care. Here are a few extra tips for specific types of mats:
- TPE mats: Avoid exposing TPE mats to direct sunlight or heat sources, as this can cause warping or curling.
- PVC mats: PVC mats can be more resistant to flattening. Try using the reverse roll technique and leaving it for a few days, or combining it with the heat treatment.
- Rubber mats: Rubber mats can be heavy and may flatten out on their own over time. However, using the weight technique can speed up the process.
How to Choose the Right Yoga Mat
Now that you’re an expert on how to flatten yoga mat, let’s discuss how to choose the right yoga mat in the first place. A high-quality mat can make all the difference in your practice and help prevent curling issues from the start.
1. Material
Yoga mats come in various materials, including PVC, TPE, rubber, and natural fibers like cotton and jute. Each material has its pros and cons in terms of grip, durability, and eco-friendliness. Consider your priorities and choose a material that aligns with your values and needs.
2. Thickness
The thickness of your yoga mat can impact your comfort during practice. Standard yoga mats are about 1/8-inch thick, but there are thinner options for those who prefer more connection to the ground and thicker options for added cushioning.
3. Texture
The texture of your yoga mat can influence its grip and how it feels against your skin. Some people prefer a smooth surface, while others like a textured or patterned mat for added traction.
4. Price
Yoga mats can range in price from budget-friendly to luxury. It’s essential to strike a balance between affordability and quality, as a cheap mat may wear out quickly or be more prone to curling.
Conclusion
Learning how to flatten yoga mat is essential for a comfortable and distraction-free practice. By using the methods outlined in this guide, you can easily transform your unruly, curled mat into a perfectly flat surface.
Remember, prevention is key. Take good care of your mat, store it properly, and clean it regularly to avoid the curling problem in the first place. Now that you have the tools to conquer the mat, go forth and enjoy a flat, stable, and serene yoga experience.
FAQs
Q1: How often should I replace my yoga mat?
A: The frequency with which you should replace your yoga mat depends on the quality of the mat, the intensity of your practice, and how well you maintain it. In general, a yoga mat should be replaced every 12-24 months. If you notice significant wear and tear or a decrease in grip, it’s time for a new mat.
Q2: Can I use a towel to help flatten my yoga mat?
A: Yes, placing a yoga towel or blanket on top of your mat can help provide a smoother surface for your practice. However, it’s essential to address the underlying issue and take steps to flatten your yoga mat permanently.
Q3: What should I do if my mat is still not flat after following the steps in this article?
A: If your mat still isn’t laying flat after trying our four-step method, consider reaching out to the manufacturer for advice or exploring the possibility of a replacement. In some cases, a mat may be defective or have a manufacturing issue that cannot be resolved through at-home methods.
Q4: Is it safe to use an iron to flatten my yoga mat?
A: It is not recommended to use an iron to flatten your yoga mat. The high heat can damage the material, potentially causing it to melt or become discolored. Instead, follow the steps outlined in this article for a safer approach to flattening your mat.
Q5: Can I use my yoga mat for other types of workouts?
A: While yoga mats can provide a cushioned surface for other types of workouts, they may not be the ideal choice for all activities. Yoga mats are designed to provide grip and support during yoga practice and may not offer the level of cushioning or support needed for high-impact activities. Consider investing in a dedicated mat for your other workouts.
Q6: How often should I clean my yoga mat?
A: It’s recommended to clean your yoga mat after each use to remove sweat, dirt, and bacteria. However, if you practice yoga less frequently or don’t sweat much during your sessions, cleaning it once a week should suffice.
Q7: Can I use a hairdryer to heat my yoga mat for the heat treatment method?
A: It’s not recommended to use a hairdryer, as it can cause the mat to overheat and warp or melt. Instead, place your yoga mat near a sunny window or a warm (not hot) radiator.
Q8: Can I iron my yoga mat to make it flat?
A: No, do not iron your yoga mat. The heat from the iron can damage the mat’s material, causing it to melt or become misshapen.
Q9: Is it okay to store my yoga mat in my car?
A: Storing your yoga mat in your car can expose it to temperature fluctuations and direct sunlight, which can cause curling or damage. It’s best to store your mat indoors, either flat, hanging, or in a mat bag.
Q10: How long should I leave the weights on my yoga mat to flatten it?
A: It’s recommended to leave the weights on your mat for at least 24 hours. However, depending on the severity of the curling and the material of your mat, it might take longer. Check the progress periodically and adjust the weights if needed.