
Table of Contents Show
Discover 7 brilliant DIY yoga mat storage solutions to declutter your space and keep your mats organized. Find the perfect storage idea for small or large spaces, and create your ideal zen environment.
If you’re a yoga enthusiast, you’ve likely faced the common issue of a cluttered and disorganized space due to the lack of proper diy yoga mat storage. But worry no more! We have the perfect solution to help you create your ideal zen space by tackling your yoga mat storage conundrum.
Disclosure: As an Amazon Associate I earn from qualifying purchases.
Let’s dive into the wonderful world of do-it-yourself yoga mat storage and discover some exciting and practical ways to keep your mats organized, clean, and ready for your next yoga session.
The Yoga Boom: Why DIY Yoga Mat Storage is the Need of the Hour
Yoga is not just a trend. It’s a lifestyle. According to a study by the National Center for Complementary and Integrative Health, the number of adults practicing yoga in the United States rose from 9.5% in 2012 to 14.3% in 2017. With the unprecedented rise of this ancient practice, a secondary issue emerged: where do all these mats go after savasana?
Enter DIY Yoga Mat Storage – the hero we didn’t know we needed. With DIY Yoga Mat Storage, you can keep your sacred space tidy and accessible, while also showcasing your yoga mat as a piece of art.
The Yoga Mat Storage Paradox
The paradox of Yoga Mat Storage is simple: while yoga encourages mindfulness and peace, the storage of yoga mats often creates the opposite – chaos. A study published in the Journal of Environmental Psychology suggests that cluttered spaces can lead to decreased productivity and increased stress. The DIY Yoga Mat Storage solution directly addresses this paradox, enabling the creation of orderly, stress-free environments.
The Anatomy of DIY Yoga Mat Storage
DIY Yoga Mat Storage, much like yoga itself, is highly adaptable to personal needs and spaces. Here are some common elements you might find:
- The Wall Mounted Rack: This is the Picasso of DIY Yoga Mat Storage. It’s an artful display that also saves floor space.
- The Basket or Bin: This is the introvert of storage solutions. It’s discreet, easy to manage, and fits snugly in a corner.
- The Rolling Cart: This is the social butterfly. It loves to move around, perfect for multi-purpose spaces or studios.
- The Ladder Rack: This is the extrovert. It stands tall, loves the spotlight, and doubles as a prop holder.
The Zen of DIY Yoga Mat Storage
The Zen of DIY Yoga Mat Storage lies in its ability to transform not just physical spaces, but mental spaces as well. It provides a sense of accomplishment, resourcefulness, and most importantly, serenity. Here’s why:
- Order and Balance: As yogis, we strive for balance both in our poses and in our lives. DIY Yoga Mat Storage brings a sense of order, creating a balanced aesthetic in your home or studio.
- Mindfulness and Intention: The process of creating a DIY Yoga Mat Storage is a practice of mindfulness and intention, mirroring the yoga journey.
- Self-expression: DIY projects are a form of self-expression. Your DIY Yoga Mat Storage can reflect your personality, tastes, and even your favorite yoga style.
Factors to Consider When Choosing a DIY Yoga Mat Storage Solution
Before we jump into the creative and functional storage ideas, let’s consider some essential factors that will help you choose the perfect diy yoga mat storage for your specific needs:
- Space Availability: First and foremost, evaluate the space you have at your disposal. Do you have a dedicated yoga room or are you working with limited space in a multi-purpose room? The storage solution you choose should fit seamlessly into your space without causing additional clutter or inconvenience.
- Budget: The great thing about DIY projects is that they are often budget-friendly. However, it’s essential to establish a budget for your storage solution to ensure you don’t overspend on materials or tools.
- Number of Mats to Store: Consider how many mats you need to store. Do you have just one or multiple mats for various practices? This will help you decide on a storage solution that can accommodate your needs.
- Aesthetic Preferences: Think about the overall look and feel of your space. Your diy yoga mat storage should not only be functional but also complement the aesthetics of your room.
DIY Yoga Mat Storage Ideas for Small Spaces
When you’re short on space, it’s crucial to make the most of every inch. Here are some ingenious small-space storage ideas for your yoga mats:
1. Wall-mounted Mat Holders
A wall-mounted mat holder is a fantastic option for those with limited space. It keeps your mats off the floor and adds a touch of style to your room.
Materials needed:
- Wood or metal hooks
- Wall anchors
- Screws
- Drill
Step-by-step instructions:
- Measure the width of your yoga mat when rolled up.
- Mark the wall where you’d like to place the hooks, ensuring they are spaced according to your mat’s width.
- Drill holes and insert wall anchors.
- Screw hooks into the wall anchors.
- Hang your rolled-up yoga mat on the hooks.
2. Over-the-door Storage Solutions
An over-the-door storage solution is another excellent way to save space while keeping your yoga mats organized.
Materials needed:
- Over-the-door hooks or towel rack
- Optional: bungee cords or straps
Step-by-step instructions:
- Hang the hooks or towel rack over the top of the door.
- If needed, secure your rolled-up yoga mats with bungee cords or straps.
- Place your rolled-up yoga mats over the hooks or rack.
3. Under-the-bed Storage Options
If you have limited wall space or prefer a more discreet storage solution, consider utilizing the space under your bed.
Materials needed:
- Under-bed storage container or long, shallow box
- Optional: lid or cover
Step-by-step instructions:
- Roll up your yoga mats and place them into the storage container or box.
- Slide the container or box under your bed.
- If desired, place a lid or cover on the container to keep dust and dirt away from your mats.
DIY Yoga Mat Storage Ideas for Larger Spaces
If you have more room to work with, these larger storage solutions might be just what you’re looking for:
4. Freestanding Yoga Mat Rack
A freestanding yoga mat rack is an attractive and versatile storage option for those with larger spaces.
Materials needed:
- Wooden dowels or PVC pipes
- Wood or metal base and top
- Screws or brackets
- Wood glue or epoxy
- Drill
- Saw
Step-by-step instructions:
- Cut the wooden dowels or PVC pipes to your desired length for the vertical supports.
- Measure and cut the wood or metal base and top pieces to the desired width, allowing enough space for all your yoga mats.
- Drill holes in the base and top pieces for the vertical supports.
- Apply wood glue or epoxy to the ends of the vertical supports and insert them into the drilled holes.
- Secure the supports with screws or brackets if needed.
- Allow the glue or epoxy to cure, then place your rolled-up yoga mats on the rack.
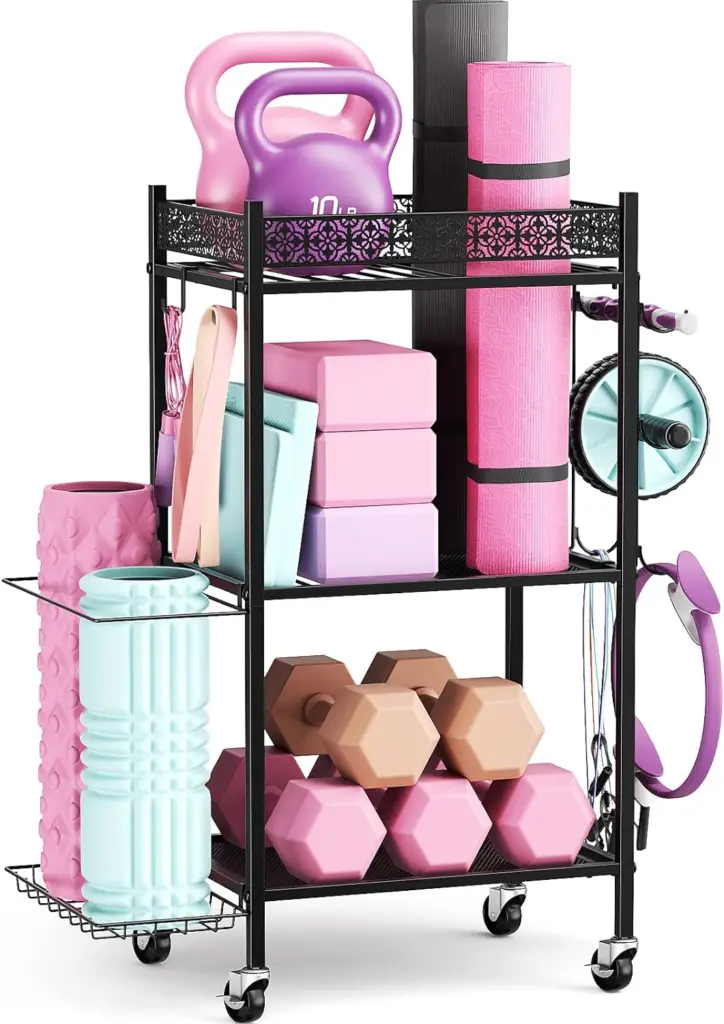
5. Multi-purpose Yoga Mat Storage and Furniture
Combine storage and functionality by creating furniture pieces that also store your yoga mats.
Materials needed:
- Wooden or metal shelving unit
- Optional: cushions, fabric, or other materials to create seating
Step-by-step instructions:
- Assemble or purchase a shelving unit with wide enough spaces for your rolled-up yoga mats.
- Place your yoga mats on the shelves, along with any other yoga props or accessories.
- If desired, add cushions or fabric to create seating on top of or around the shelving unit.
You may also like: 7 Powerful Ways Yoga Mat Racks Transform Your Practice: More Than Just A Storage Solution
DIY Yoga Mat Storage Ideas for Outdoor Spaces
For those who enjoy practicing yoga outdoors or have limited indoor space, consider these outdoor storage solutions:
6. Weatherproof Outdoor Storage Box
A weatherproof storage box will keep your yoga mats safe from the elements while providing easy access when needed.
Materials needed:
- Weatherproof storage box or container with a lid
- Optional: outdoor cushion or fabric
Step-by-step instructions:
- Roll up your yoga mats and place them inside the storage box.
- Close the lid securely to protect your mats from the elements.
- If desired, place an outdoor cushion or fabric on top of the storage box to create additional seating.
7. Hanging Yoga Mat Storage
Hanging your yoga mats outside can help them air out and dry more quickly after use.
Materials needed:
- Clothesline or rope
- Clothespins or clips
Step-by-step instructions:
- Install a clothesline or rope in a covered outdoor area, ensuring it’s securely anchored.
- Attach clothespins or clips to the clothesline.
- Hang your yoga mats over the line, securing them with clothespins or clips.
You May Also Like:
- 6 Powerful Reasons Yoga Mat Storage Bin Will Revolutionize Your Space and Practice
- 7 Powerful Ways Yoga Mat Racks Transform Your Practice: More Than Just A Storage Solution
- The Ultimate Guide to a DIY Earthing Mat: The 7 Simple Steps of Reconnecting with Nature
Conclusion
With these creative and functional diy yoga mat storage ideas, you’ll no longer have to worry about disorganized and cluttered spaces. Choose the storage idea that best fits your needs and enjoy a clean, organized, and inviting yoga practice area.
Frequently Asked Questions
Q1: What materials can I use for a diy yoga mat storage solution?
A: You can use various materials, such as wood, metal, PVC pipes, or even repurposed furniture. The choice depends on your budget, available space, and personal preferences.
Q2: How can I prevent my yoga mat from unrolling when stored?
A: You can use straps, bungee cords, or even rubber bands to keep your yoga mat rolled up and secure when stored.
Q3: Is it safe to store my yoga mat outdoors?
A: Yes, as long as you use a weatherproof storage solution and keep it in a covered area to protect it from direct sunlight and rain.
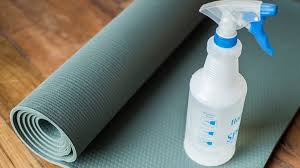
Q4: How often should I clean my yoga mat?
A: It’s recommended to clean your yoga mat after every practice or at least once a week, depending on the intensity and frequency of your practice. Regular cleaning helps remove dirt, sweat, and bacteria, ensuring a hygienic practice environment and will help maintain the mat’s grip, hygiene, and longevity.
Q5: Can I store other yoga props and accessories using the same storage solutions?
A: Absolutely! Many of the storage solutions mentioned in this article can accommodate not only yoga mats but also blocks, straps, blankets, and other yoga accessories. Just ensure you have enough space and adjust the storage design if necessary.
Q6: Do I need any special tools or skills to create a diy yoga mat storage solution?
A: Most of the storage ideas mentioned in this article require basic tools such as a drill, saw, and screwdriver. Some woodworking or crafting skills may be helpful but are not necessarily required. You can find many tutorials and guides online to help you through the process.
Q7: How can I add a personal touch to my diy yoga mat storage?
A: There are numerous ways to personalize your storage solution. You can paint or stain the wood, add decorative elements such as decals or stencils, or even incorporate your favorite colors and patterns through fabric or cushions. The possibilities are endless!
Q8: How do I choose the right diy yoga mat storage solution for my needs?
A: Consider factors such as the available space, your budget, the number of mats you need to store, and your aesthetic preferences. By evaluating these factors, you can choose the storage solution that best suits your specific requirements and complements your yoga space.
Q9: How can I repurpose an existing piece of furniture for yoga mat storage?
A: Look for furniture pieces with shelves or compartments that can accommodate your rolled-up yoga mats. Alternatively, you can attach hooks, brackets, or other hardware to an existing piece of furniture to create a custom storage solution. Be creative and think about how you can modify or enhance the furniture to meet your storage needs.

Comments are closed.