Table of Contents Show
Dive into our comprehensive guide on DIY earthing mats. Discover the science, benefits, materials needed, and step-by-step process for creating your grounding solution at home.
You may have heard of ‘earthing’ or ‘grounding’ – the simple act of connecting with the Earth’s surface to improve wellbeing. But did you know you can harness these benefits from the comfort of your home using a DIY earthing mat? With this comprehensive guide, we’ll dig into the science, benefits, and, most importantly, how you can create your very own DIY earthing mat.
Disclosure: As an Amazon Associate I earn from qualifying purchases.
Understanding the Science Behind Earthing
Has the phrase “DIY earthing mat” got you scratching your head? What is this phenomenon all about? Here, we will break down the science and dispel the myths.
The Phenomenon Known as Earthing
In a nutshell, earthing or grounding refers to the process of making direct physical contact with the vast supply of electrons on the surface of the Earth. This process is thought to promote significant health benefits, including improved sleep, decreased stress, and reduced inflammation. But how exactly does this work?
The Earth carries a negative charge, thanks to a virtually unlimited reservoir of free electrons. When we make direct contact with the Earth, these electrons are absorbed into our body. The process is believed to neutralize positive ions—associated with inflammation and disease—thus fostering improved wellbeing.
Is there Scientific Backing?
Are these all just fanciful claims, or does science back this up? Well, several studies indicate that earthing can indeed provide numerous health benefits. According to a 2012 review in the Journal of Environmental and Public Health, grounding can improve sleep, reduce pain, decrease stress, and enhance overall wellbeing.
Isn’t that fantastic? Wait until you hear about the power of a DIY earthing mat!
Embracing the Power of the DIY Earthing Mat
So, you understand the science, but what about the mat? How does a DIY earthing mat fit into the picture, and more importantly, why should you consider making one?
What Exactly is a DIY Earthing Mat?
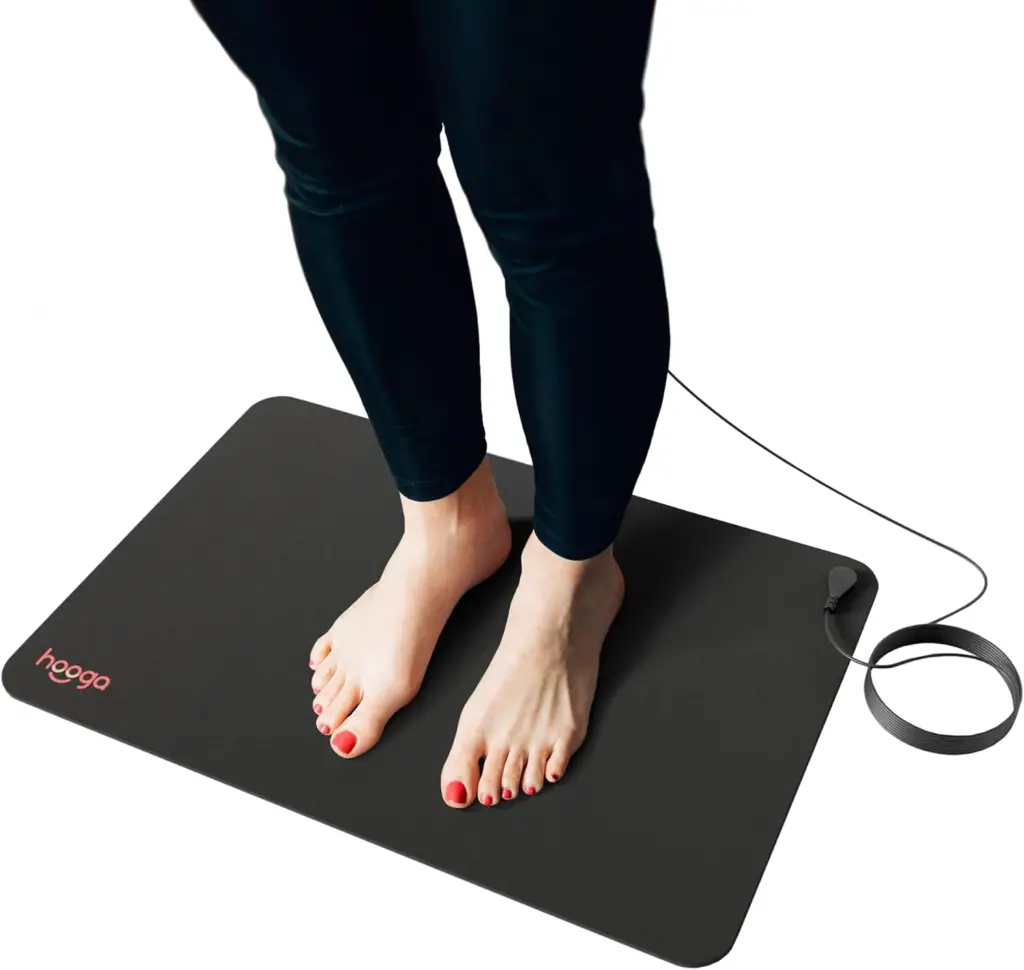
An earthing mat, also referred to as a grounding mat, is a device that aids in grounding. It’s typically made of durable material and embedded with conductive materials such as silver or copper. The mat is then connected to the Earth via a wire plugged into a grounded wall outlet or a rod pushed into the ground outside.
A DIY earthing mat follows the same principles but allows you to craft one using common household items. Plus, it’s a fun and rewarding project.
The Benefits of Crafting Your DIY Earthing Mat
Why should you consider going the DIY route? Here are some compelling reasons:
- Cost-effectiveness: Store-bought earthing mats can be expensive, with prices ranging from $50 to over $200. On the other hand, a DIY earthing mat can be made for a fraction of the cost.
- Personalization: By making your own mat, you can customize it to your liking—choose your materials, size, and even color.
- Satisfaction: There’s a certain satisfaction that comes with completing a DIY project, knowing you’ve created something with your own hands.
Feeling pumped and ready to create your DIY earthing mat? Let’s get to it.
How to Create Your DIY Earthing Mat: A Step-by-Step Guide
Crafting your DIY earthing mat isn’t rocket science. With the right materials and instructions, you’ll have your grounding mat ready in no time.
Necessary Materials
To start your DIY project, you’ll needthe following items:
- A conductive fabric (like silver or copper-infused fabric)
- A grounding cord
- Sewing materials (thread, needle, and scissors)
- A non-conductive fabric (such as cotton) for the backing
The conductive fabric and grounding cord can be found in online stores or local electronic stores. You can also repurpose old materials, like copper mesh used in screen doors.
The Process
- Preparation: Measure and cut the conductive fabric to your desired size. A 2×3 feet mat works well for most, but feel free to adjust to your liking.
- Sewing: Cut a similar-sized piece from the non-conductive fabric. Place it against the conductive fabric (wrong sides together), and sew around the edges to make a neat seam. Leave a small opening.
- Grounding: Attach one end of the grounding cord to a spot on the conductive side of the fabric. You can do this by sewing it on or using an alligator clip. The other end of the cord will connect to the Earth.
- Final Touches: Once the cord is secured, close the small opening you left in the fabric. Your DIY earthing mat is now ready to use!
To connect to the Earth, plug the grounding cord into the third hole (ground) of a grounded wall outlet, or connect it to a grounding rod if you have one. Always test your outlet for proper grounding before use.
DIY Earthing Mat: Troubleshooting Common Problems
It’s not always smooth sailing when embarking on a DIY project. You may encounter some bumps along the way, but don’t worry—we’re here to help! Here are some common issues and how to troubleshoot them:
Problem: The grounding cord won’t stay attached to the mat.
Solution: You can either sew the cord more securely or use a strong alligator clip. If using an alligator clip, ensure it’s firmly clamping the fabric and the grounding wire.
Problem: The mat isn’t conducting as it should.
Solution: The issue could be with the conductive fabric. Ensure you’re using a high-quality conductive fabric. Also, make sure the fabric isn’t soiled or excessively worn out.
Problem: The grounding cord doesn’t reach the grounding source.
Solution: You can purchase an extension grounding cord from electronic stores or online. Ensure it has the correct plug for your region and suitable for grounding.
Caring For Your DIY Earthing Mat
Creating your mat is only part of the journey—ensuring it remains effective involves proper care. How can you do this?
- Cleaning: Avoid harsh detergents as they can compromise the conductive properties of the fabric. Instead, use mild soaps and warm water.
- Storage: When not in use, store your mat in a clean, dry place to prolong its lifespan.
- Regular checks: Check the conductivity of your mat regularly using a multimeter. This helps ensure it’s functioning correctly and you’re still grounding effectively.
Congratulations! You’ve taken the steps to create your very own DIY earthing mat.
Maximizing the Benefits of Your DIY Earthing Mat
Now that you’ve got your DIY earthing mat, how can you get the most out of it? Here are a few tips:
- Consistent Use: Like with any wellness practice, consistency is key. Try to use your earthing mat regularly. You can stand or sit on it during the day or sleep on it at night.
- Bare Skin Contact: For the best grounding effect, ensure your bare skin is in direct contact with the mat. If it’s not comfortable or practical, use thin fabric between your skin and the mat.
- Relaxation: To enhance the grounding experience, use the mat when you’re calm and relaxed. You can even pair the practice with mindfulness or meditation.
- Hydration: Staying hydrated can improve the conductivity of your body and enhance the grounding effect.
Remember, grounding is a holistic practice. It’s not just about standing on a mat; it’s about embracing the connection with nature and promoting overall wellbeing.
You May Also Like:
- 7 Brilliant DIY Yoga Mat Storage Solutions to Declutter Your Space
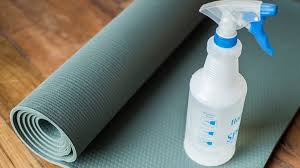
- 5 Simple Steps to Make Your Own Yoga Mat Spray: A DIY Guide to Clean and Fresh Mats
- How to Make Your Own Yoga Mat: The Top 4 Profound Steps to Self-Sufficiency
- How to Make Yoga Mat Bag: The Ultimate DIY Guide for Your Perfect Yoga Companion in 4 Simple Steps
- Find Your Zen with a DIY Yoga Mat Knitting Pattern (5-Step Process)
Conclusion
The DIY earthing mat is more than just a wellness trend—it’s an innovative, science-backed way to reconnect with nature’s healing properties from the comfort of your own home. Whether you’re in pursuit of better sleep, reduced stress, or improved overall wellbeing, creating your own DIY earthing mat could be the grounding solution you need. Plus, it’s cost-effective and personally rewarding.
Embrace this grounding phenomenon and let the electrons flow!
Frequently Asked Questions (FAQs)
Q1: How do I test if my DIY earthing mat is working?
A: A multimeter is your best bet. Attach the multimeter to the grounding cord of your mat, then measure the voltage when standing barefoot on the mat. You should see a significant reduction in voltage compared to when you’re not standing on the mat.
Q2: Can I use my DIY earthing mat while sleeping?
A: Absolutely! In fact, many people use earthing mats while sleeping to benefit from prolonged grounding. Just place the mat under your feet or across your chest.
Q3: What can I do if my home outlets aren’t grounded?
A: If your home doesn’t have grounded outlets, you can use a grounding rod system instead. This involves pushing a metal rod into the ground outside and connecting it to your mat.
Q4: Can I use any fabric for my DIY earthing mat?
A: The key to an effective earthing mat is conductivity. Thus, a conductive fabric like one infused with silver or copper is crucial.
Q5: How often should I use my DIY earthing mat?
A: For the best results, try to use your earthing mat as much as possible. This could mean standing on it while working, sitting on it while reading or watching TV, or sleeping with it.
Q6: Can I travel with my DIY earthing mat?
A: Absolutely. One of the benefits of a DIY earthing mat is its portability. You can roll it up and take it with you wherever you go, ensuring you can always reconnect with the Earth.
Q7: Can I use the DIY earthing mat if I have a pacemaker or another implanted device?
A: As a precaution, individuals with pacemakers or other implanted devices should consult their healthcare professional before starting grounding therapies.
You May Also Like: Unraveling the Yoga Mat Manufacturing Process: The Intriguing Odyssey Behind Your Yoga Mat
Q8: Are there any potential side effects of using a DIY earthing mat?
A: Grounding is generally safe and natural. However, some people may experience initial mild discomfort, such as tingling or warmth, as their bodies adjust to the grounding effect.
Q9: Can I wash my DIY earthing mat in the washing machine?
A: Hand washing is the safest option as the washing machine could damage the conductive materials. Use a mild detergent and warm water.
Q10: How soon can I expect to see the benefits of using my DIY earthing mat?
A: Everyone’s experience with grounding is unique. Some people feel a difference within a few minutes of using the mat, while others may need a few weeks to observe changes.